

Commercial Kitchen Hood Installation: A Contractor's Guide
A single code failure during a kitchen inspection can delay a restaurant opening for months. Contractors must plan and handle each hood setup with care to protect lives.
Contact AirSupply for a free hood sizing consultation
Commercial kitchen hood installation is a strict, code-governed process that must follow local fire rules and building laws to keep people safe. To succeed, contractors must mount a Type I hood at the correct height and maintain a clearance of eighteen inches from any combustible walls. You must also size the exhaust ductwork to keep air speed at five hundred feet per minute or more. At the same time, you must add a make-up air unit to balance the room pressure. This step prevents smoke from spilling and helps the exhaust fan run at full power. Our commercial kitchen ventilation hoods buyer's guide offers step-by-step sizing rules to help you select the right equipment for any commercial layout.
Planning a safe, compliant setup needs you to look at the layout, local codes, and hood sizes before you mount a single bracket. For a commercial kitchen hood installation, the work starts long before any bracket goes up. The section below walks through a practical planning sequence you can follow for your next kitchen job.
How to Plan a Commercial Kitchen Hood Installation for Your Client
Identify the Cooking Gear and Hood Duty
A solid commercial kitchen hood installation starts with a clear plan. You must check what types of cooking units your client will use in their kitchen. Under local building codes, hoods are grouped by duty levels based on the heat and smoke of the stoves. These duty levels range from light to extra-heavy. Before you buy any gear, you must find out if the kitchen needs Type 1 vs Type 2 commercial kitchen hoods to match the menu. This first choice keeps the project safe and legal.
Verify Structural Supports and Safety Standards
A safe setup needs strong structural supports. You must design and build these supports from noncombustible parts. The supports must be strong enough to carry both gravity and seismic loads without shifting over time. Also, you must check if the pre-made hood model has a UL 710 label. This label shows that the unit meets standard fire and safety tests. Our commercial kitchen ventilation hoods buyer's guide offers a full breakdown of these model types.
Step-by-Step Installation Planning Process
Once you know the code rules and structural needs, you can map out the actual work. Following a set path helps avoid mistakes, saves time, and keeps the project on budget. Use this clear sequence to guide your team through each phase of the work.
- First, measure the cooktop area and check the clear space. You must make sure the hood extends past the cooking surfaces by the correct distance to trap all rising heat and grease.
- Next, inspect the ceiling joists and mount the structural supports. Make sure the steel brackets can handle the weight of the hood even during shaking.
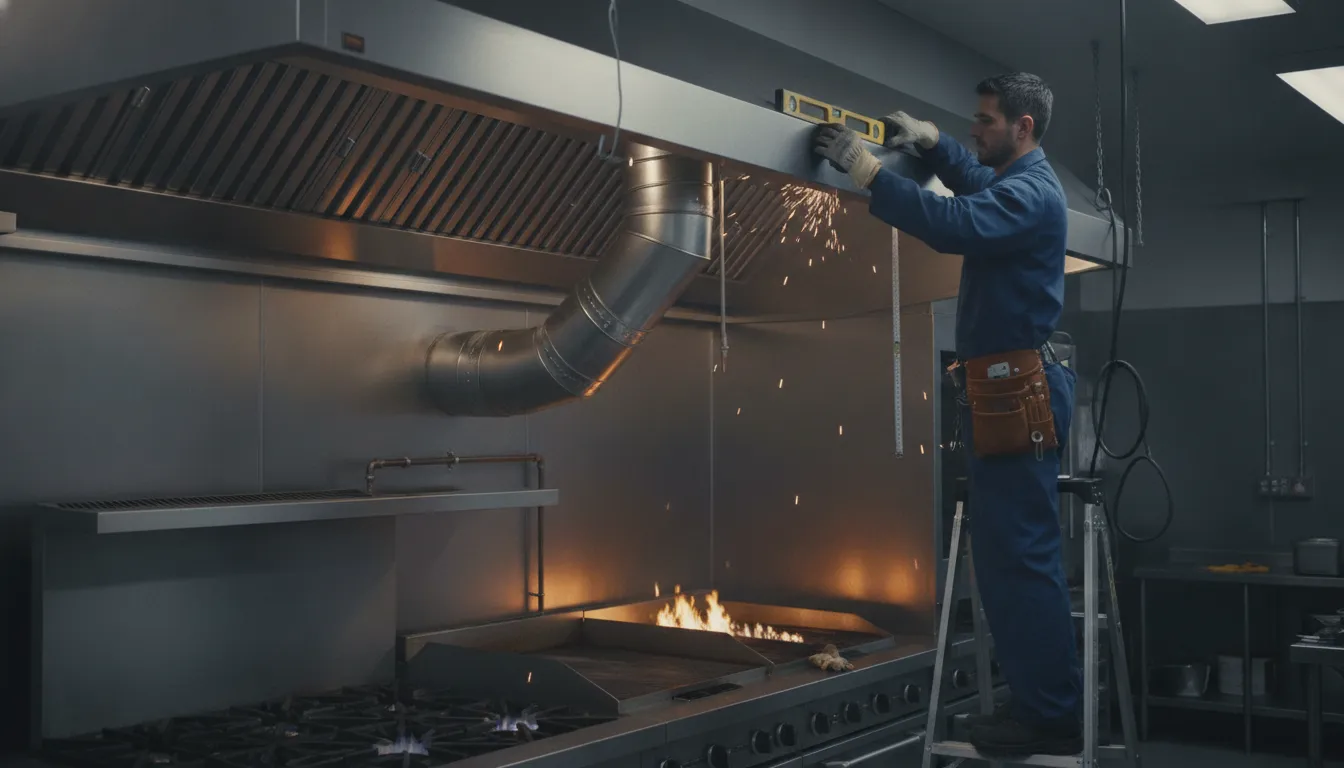
- Then, hang the hood and check that it is level. Adjust the tension rods to balance the weight and check that there is no slant in any direction.
- After that, connect the ductwork and seal all joints. You must weld or lock the ducts tightly to prevent grease leaks and fire hazards behind the walls.
- Last, connect the electrical wiring for the fan and the make-up air. Test the system to make sure both fans turn on at the same time when the heat rises.
Once the physical setup is complete, you should perform a test run before the official code review. Turn on all the cooking gear to check if the hood draws smoke properly and keeps the air clean. Make sure there are no odd sounds or rattles in the ductwork. If you find any draft issues or pressure gaps, you may need to adjust the makeup air supply to balance the room. Doing these final checks helps secure a smooth sign-off from the fire marshal and a safe workspace for your client.
Mounting Height and Clearance Requirements Under NFPA 96
Safety is the key part of any commercial kitchen ventilation hoods buyer's guide. Fire protection codes like NFPA 96 keep your staff and building safe from grease fires. You must follow these strict standards when you plan a new commercial kitchen hood installation. These codes dictate where you put your hood and how far it must be from other materials. This section covers the core height and distance rules you must know.
Type I hood requirements
You must know when to use a Type I hood. Under local building codes, Type I hoods must be installed over cooking appliances that produce grease or smoke. This includes commercial fryers, griddles, and broilers. These systems trap grease and keep it out of your walls. If you cook with oil, you need a Type I hood to stay safe.
Choosing the right brand-new gear is also vital. You can view our high-quality kitchen and mobil kitchen ventilation hoods collection to find the best fit for your layout. Having the correct parts makes the setup process much easier for your team. If you use mismatched parts, you risk losing your air balance. Getting everything from one source makes sure that the fan and hood work well together.
Clearance from combustible materials
You must watch the space between your hood and any wood or drywall. Fire codes state that a minimum distance of 18 inches is required between a hood and combustible materials. This space prevents heat from setting nearby structures on fire. If you cannot keep this gap, you must use approved noncombustible clearance methods.
These rules keep your business safe and help you pass your local inspection. For more details on the code, you should read our guide on NFPA 96 exhaust system requirements. Knowing these rules before you hang the hood will save you time and money. An inspector will check these clearances first. If you fail to meet the distance rules, you may have to tear down your work and start over.
Rules for extra-heavy-duty appliances
Extra-heavy-duty cooking appliances have much stricter venting rules. These appliances include solid fuel cookers like wood-fired ovens or charcoal grills. When you handle these systems, Type I hoods over extra-heavy-duty appliances must discharge to an independent exhaust system. They cannot cover other appliances that need different fire protection systems.
Mixing appliance types under one hood can create a major fire hazard. Code rules keep hot embers from starting fires in grease from standard cookers. Solid fuels create high amounts of ash and creosote. Mixing them with standard cooking fat leads to intense fires. Make sure your design keeps heavy solid fuel systems apart from standard gear to stay safe and compliant.
Ductwork Connection: Material, Size, and Grease Trap Placement
Proper ductwork setup is a vital step in any commercial kitchen hood installation. This exhaust system carries hot air, grease, and smoke out of the building safely. You must use the right metals and duct sizes to meet local building codes. Using the wrong parts can lead to dangerous fires and expensive code fines.
Duct Material and Thickness
Under standard code rules, grease exhaust ducts must be made of strong metals. Your grease exhaust ducts must have a minimum thickness of 16-gage steel or 18-gage stainless steel. The Type I hood itself must be made of at least 18-gage steel or 20-gage stainless steel. These specific material rules are shown in the Philadelphia Plan Review checklist.
| Material Type | Minimum Duct Thickness | Minimum Hood Thickness | Code Allowed for Grease |
|---|---|---|---|
| Carbon Steel | 16-Gage | 18-Gage | Yes |
| Stainless Steel | 18-Gage | 20-Gage | Yes |
| Galvanized Steel | Prohibited | Not Allowed | No |
Choosing the right metal is vital for both system life and your budget. Stainless steel fights rust well and is easy to clean, but it costs more. Carbon steel costs less upfront but needs extra coatings to resist rust. To find the right parts for your setup, browse our ventilation accessories to complete your system.
Exhaust Velocity and Slope
Air must move through your ducts fast enough to stop grease buildup. To prevent dangerous fire hazards, the air velocity in a grease exhaust duct must be a minimum of 500 feet per minute. If air moves too slowly, grease cools down and sticks to the duct walls. You must keep the fan speed high enough to maintain this flow rate.
Duct slope is another critical factor for commercial kitchen safety. Horizontal grease ducts must be sloped to ensure grease cannot collect in any portion of the system. This slope lets liquid grease flow naturally toward a cleanout or drain trap. You can read more about code-compliant designs in our guide on NFPA 96 exhaust system requirements.
Grease Collection and Accessories
Your ventilation system needs proper grease traps to catch runoff from the hood. These traps collect liquid grease before it can block your exhaust fans. You must place grease cups at the base of the hood filters. Clean out these grease cups often to prevent spills and protect your exhaust fans.
You must also install tight access doors in your ductwork system. These doors let certified technicians clean the inside of the ducts. A heavy gasket is needed to seal the door and prevent grease leaks. Regular professional cleaning keeps your system compliant with health codes.
Makeup Air Integration: Connecting the Hood to Your MUA Supply
Setting up a commercial kitchen hood requires you to look at exhaust and incoming air. You cannot design a safe system by only pulling air out. You must also bring fresh air back into the space to keep the building safe and comfortable. Without a plan for incoming air, your ventilation system will not function as it should.
Air Pressure Balance in the Kitchen
A good kitchen system uses exhaust fans and make-up air units to balance air pressure. When your exhaust fan pulls grease and hot air out of the kitchen, it creates a vacuum. If you do not replace this air, you will have draft issues and doors that are hard to open.
You can solve this common issue with makeup air units in your layout. These systems feed fresh outdoor air back into the room. They replace about eighty percent of the air that the hood removes. This balance keeps the air flowing in the right direction without wasting energy. It also stops cold drafts from entering the kitchen through small cracks.
Automatic Interlocks and Heat Sensors
Modern building codes do not allow kitchen staff to turn on the exhaust and supply fans by hand. You must use a heat sensor or other device to ensure that both systems start at the same time. This sensor ensures the automatic operation of both the kitchen hood and the make-up air systems upon activation of the cooking devices. You can read more about these rules in the commercial kitchen hood plan review checklist. This interlock system ensures that the fans run whenever there is heat on the line.
Wiring these controls is a key step in a commercial kitchen ventilation system installation. The sensor is placed inside the hood canopy. When a cook turns on a stove or grill, the rising heat triggers the sensor. This signal tells the starter panel to turn on the exhaust fan and the make-up air unit at the same time. The fans will continue to run until the cooking surface cools down.
Avoiding Fuel Vent Interference
When you install a large exhaust fan, you must also think about other gas tools in the room. Provisions must be made to prevent the hood system from interfering with the normal operation of the vents for these appliances. If the exhaust fan is too strong and there is not enough make-up air, it can pull toxic gas back into the room. This dangerous backdraft is a major safety hazard.
To avoid this, connect the make-up air duct directly to the supply plenum on the hood. This design delivers fresh air right where it is needed. It keeps the kitchen pressure stable and ensures that gas vents can draft safely to the outside. This step is vital for the safety of everyone working in the building.
What a Fire Marshal Looks For During Inspection and Testing
Passing the local fire marshal inspection is the final step in a safe commercial kitchen hood installation. Cooking equipment causes a large share of restaurant fires each year. Because of this risk, inspectors check every detail of your system. They want to make sure the setup protects your staff and your building from grease fires.
Permits and shop drawings
The fire marshal will check your permit files and approved plans on-site before they walk the kitchen. Inspectors will ask for the hood shop drawings and cut sheets. For factory-built hoods, these drawings must show that the unit complies with UL 710 standards. This proof shows that the hood can handle extreme heat and stop grease leaks.
Inspectors will check your submittals to verify that all equipment matches the approved plans. If you made any changes during the installation process, you must report them first. Missing files can delay your approval and keep the kitchen from opening on time. Having your cut sheets ready will make the walk go much faster.
Material and clearance standards
Next, the inspector will look closely at how the hood and duct are made. Under standard safety codes, a Type I hood must be steel that is at least 18-gage, or stainless steel that is 20-gage. The grease ducts attached to the hood need even thicker walls. These ducts must be at least 16-gage steel or 18-gage stainless steel to prevent warping.
Inspectors also measure the space between the hood and any walls. You must keep a space of at least 18 inches between the hood and any wall that can burn. If you have less space, you must use approved fire-safe barriers to protect those walls. These rules are part of the strict NFPA 96 exhaust system requirements that prevent kitchen fires.

Supports and duct testing
Finally, the fire marshal checks how the hood is held up and how it vents air. The hood supports must be made of metal that will not burn and can withstand seismic movement. The inspector will also check the slope of any horizontal grease ducts. These ducts must slope toward a grease cup so that grease cannot pool in the system.
The fire marshal may run a test to check that exhaust air speed is at least 500 feet per minute. If the speed is too low, grease can settle in the duct and cause a fire hazard. Using parts from our commercial kitchen ventilation hoods buyer's guide helps you pass this check. You can also browse our verified ventilation hoods to find the right parts.
Ready to start your next hood installation? Talk to an AirSupply expert today
Frequently Asked Questions
How much does it cost to install a commercial kitchen hood system?
The total cost to install a system depends on the parts you choose. A basic set of components from a wholesale supplier can cost around $900. Professional installation and permit fees often add $2,000 to $5,000 to that price. Complex jobs with long duct runs can cost much more.
Can I install my own commercial hood?
Yes, you can install the hood yourself to save money on labor. However, you must still follow strict local building codes. Under city building codes, all hood supports must be noncombustible. They must also be able to hold gravity and seismic loads. A licensed pro must still connect the power and fire systems.
What are the requirements for exhaust hood in a commercial kitchen?
First, you must put a Type I hood over any cooking equipment that produces grease or smoke according to building code plan review checklists. The same code sources require at least 18 inches of space between the hood and any combustible walls. Also, the system needs a sensor to turn on the exhaust fan automatically.
What is the difference between a commercial hood and a residential hood?
A residential hood only filters light smoke and steam from home cooking. A commercial hood is built for heavy use and must meet strict fire safety rules. For example, commercial grease ducts must be made of thick steel. Under city building codes, grease ducts must be at least 16-gage steel.
Ready to plan your next hood installation?
Putting off your kitchen vent layout can lead to failed code checks, costly project delays, and unhappy clients who want their space open. Sizing your airflow and ducts today prevents costly shipping errors, avoids field fixes, and ensures your parts arrive ready to install. This simple step ensures you get a balanced system that passes local fire marshal code checks on the very first try.
Ready to book? Contact us today to reach out for a free sizing consultation. Our commercial ventilation experts will help you select the exact fans, hoods, and makeup air units you need for your job. Do not let system sizing issues hold up your build schedule when we are here to help.